Introduction of architectural model photography
Architectural model photography has a significant role to play.
Because a good photograph helps smooth the progress.
And meanwhile, poorly taken photos can mislead the audience thus preventing them from seeing the real quality of the model.
This chapter introduces the necessary equipment required in architectural model photography.
It touches on lighting, viewpoints, and the areas that need attention.
Listed below are the equipment frequently used in architectural model photography.
1.1 Digital SLR Camera
If you are a beginner in photography, we recommend using the fully automated “A” mode.
This means that the camera will adjust the aperture, the shutter speed, and the ISO automatically for you.
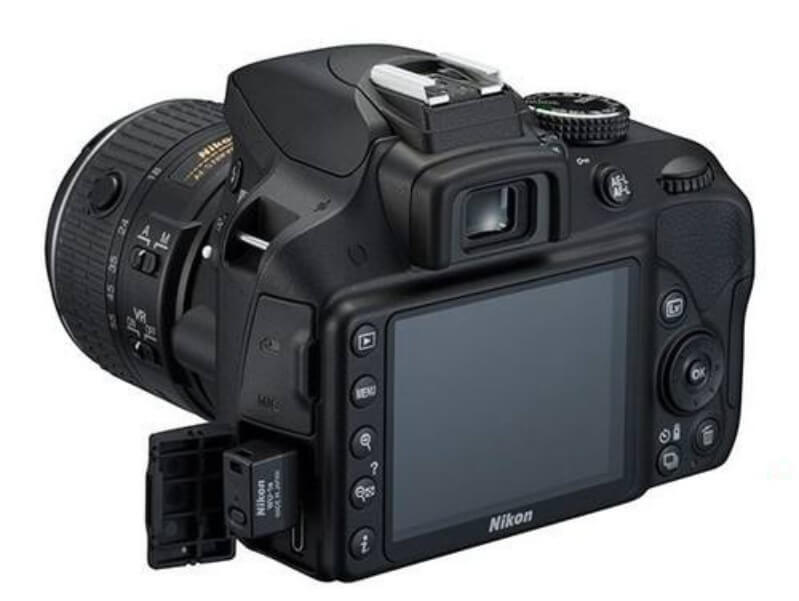
Digital SLR Camera
Because the point of focus set with automatic focus may not be your expected focal point.
When taking a photo of your scale model, press the shutter button down halfway.
Once you hear a “beep” sound, fully press the shutter button to take the photo. This will ensure a clear picture.
After these, if you wish to improve your photography techniques further, you need to understand the camera.
For example, the relationship between aperture, shutter speed, ISO and how a change in one of these elements necessitates a change in the others.
Then practice with different numerical values to achieve the desired visual effects you want to express through your photo.
1.2 Fix-focus wide angle lens or 18-105 mm zoom lens
In digital SLR photography, there is often a need to change lens.
And in architectural model photography, the most common lens to use is the wide angle lens, so we suggest you equip yourself with one.
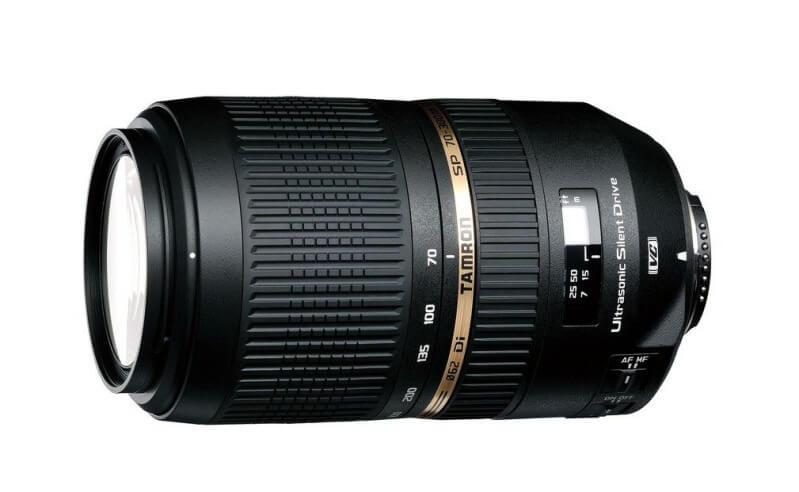
Fix-focus wide angle lens or 18-105 mm zoom lens
1.3 Remote Shutter Release
A remote shutter release can help to control the camera shutter release.
So you no need to touch the release button on the camera.
In fact, in an indoor photo shooting session, a longer exposure is very useful.
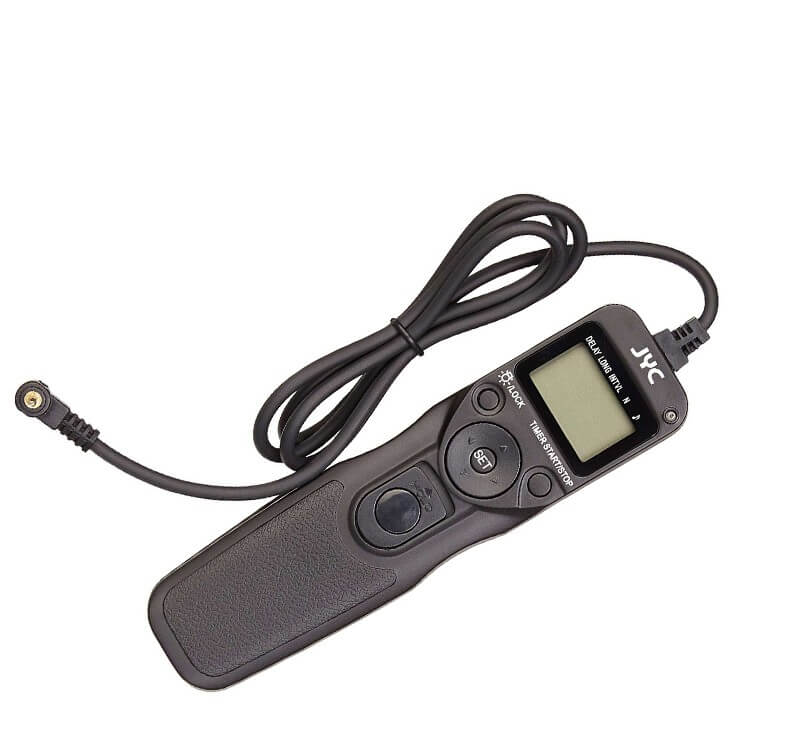
Remote Shutter Release
The remote shutter release can stop the camera shaking caused by pressing the button during a long exposure.
So that it can prevent a blurry photograph.
We recommend using a remote shutter release when photographing indoors.
1.4 Memory Card
A memory card stores the digital photos taken by the digital SLR.
And the most common one is an SD card, and in a digital camera, CF (Compact Flash).

Memory Card
Memory cards come in an array of different storage capacities.
As the photo resolution of the camera increases, the volume of data increases too.
Since the price of it is steadily decreasing, we recommend getting it with at least 4 GB storage capacity.
1.5 Memory card reader machine
A laptop frequently comes with a built-in memory card reader (CF card) while desktop computers do not.

Memory card reader machine
In such a case, you can purchase a card reader to connect to your desktop computer.
1.6 Tripod
When photographing indoors, the absence of natural light results in slower shutter speeds.
If the camera is held manually, it can cause the camera to shake.
Because it is unlikely that our hands can keep still and give us a sharp picture.
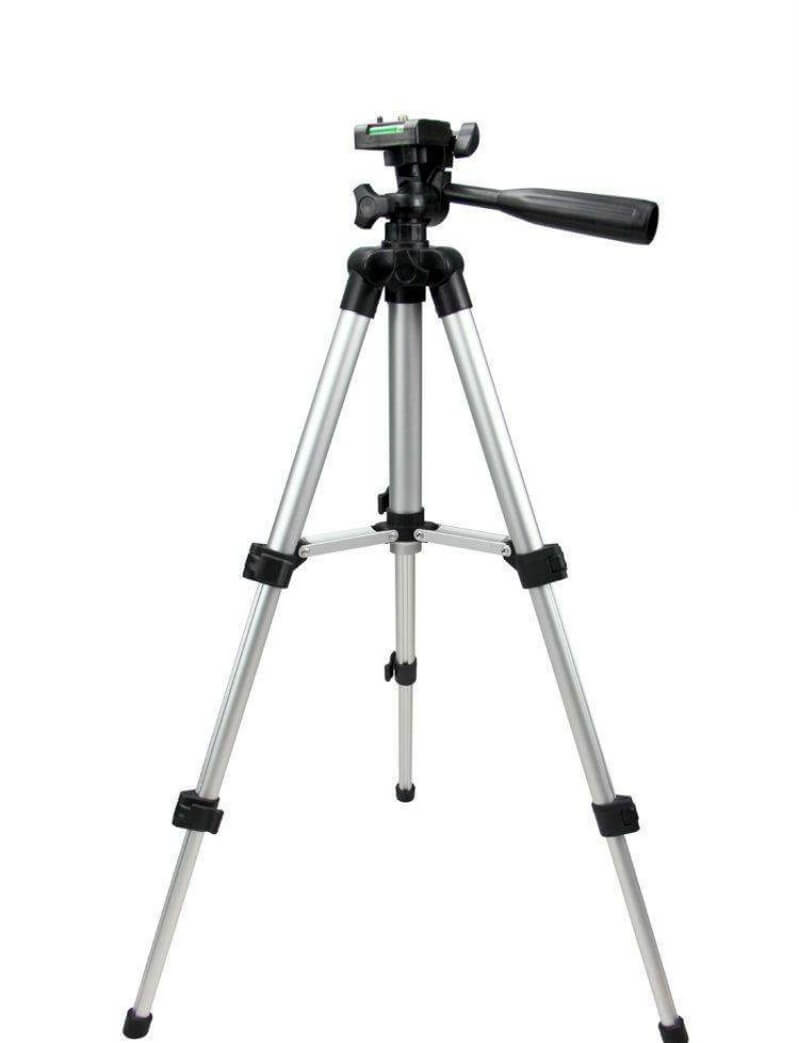
Tripod
Hence, a tripod is an indispensable tool to prevent camera shakes during long exposures as it keeps the camera still.
1.7 Backdrop
This is the screen used as a background during photography.
In architectural model photography, we usually use a black, blue or grey backdrop.
If you use a proper photography background screen or cloth, light reflection is lessened.
Compared to paper where seams may show up, the screen is wider, providing a seamless background.
1.8 Still Life Stand
Still life stand a platform on which the subject to be photographed can be placed.
1.9 Lighting equipment
It is a must-have in indoor photography, and there is a large variety of lighting equipment available in the market.
A soft box is made up of a black exterior cloth that prevents light reflecting back into the room.
A translucent fabric to diffuse the light, a wire frame, and a light source.
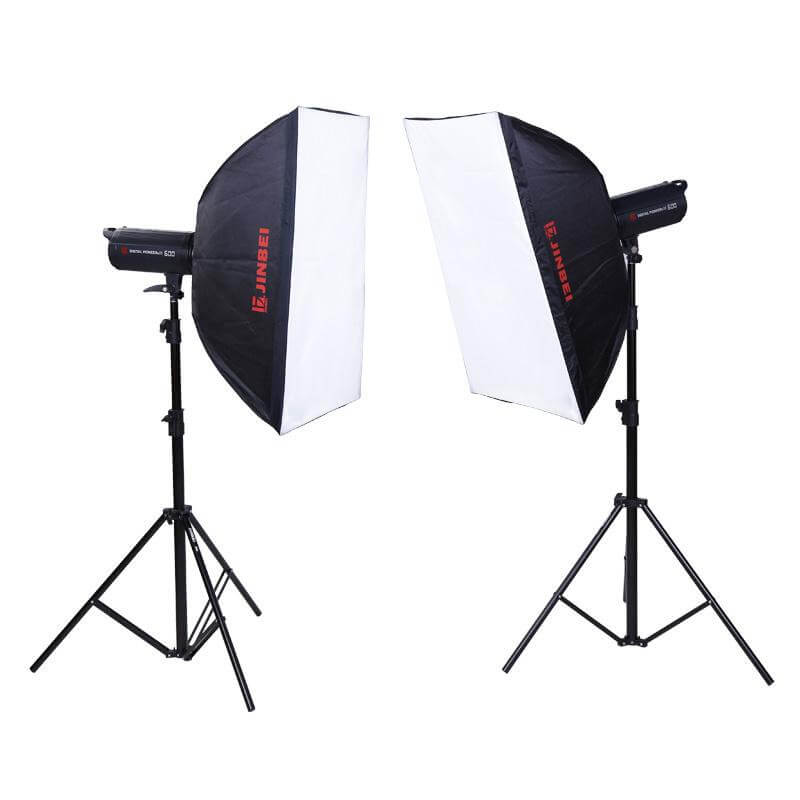
A soft box diffuses light to produce a softer light.
There are many other types of lighting equipment to choose from.
And the kind of lighting equipment to use depends on the type of photo you want to take.
1.10 Light reflector
When the light hits the reflector, it bounces off and redirects onto the model, further softening the light source.
You can replace the light reflector with a polystyrene foam board or foam paper.
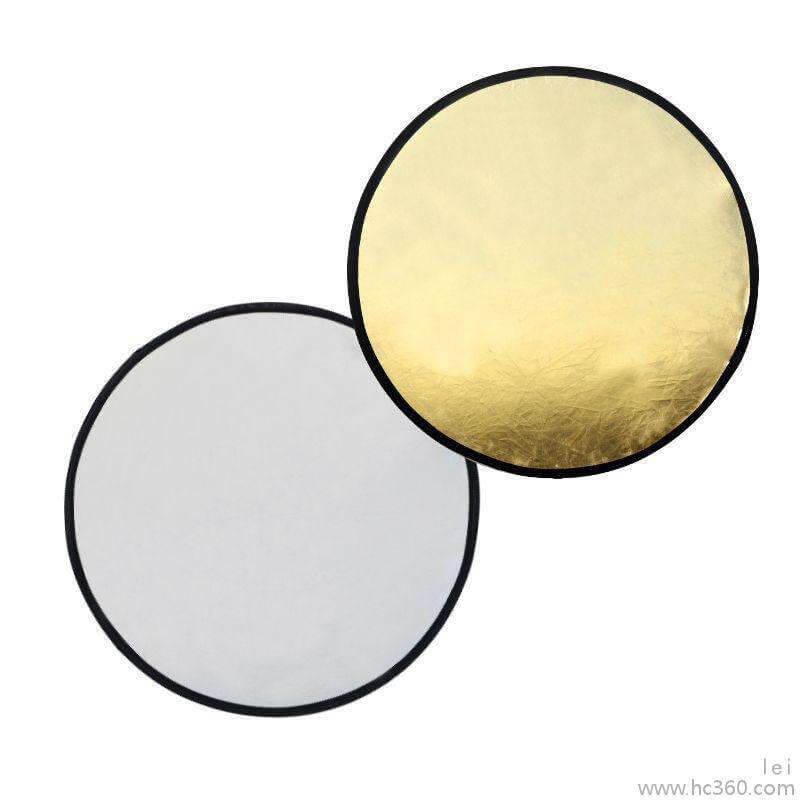
Light reflector
For practicality and convenience during use, we recommend investing in a light reflector stand.
This way, we are not restricting the positioning of the reflector.
If there is a help to hold the reflector, a reflector stand is not necessary.
However, if you are working on your own, then a reflector stand is essential.
2. Lighting
The easiest way to resolve the lighting issue with photography is to do your photo shoot outdoor.
Because there is an abundance of natural light.
2.1 Timing
On the early morning or dusk of a cloudless sunny day, the position of the sun is low.
So it is attaining high contrast lighting, rendering a perfect shadow effect on the architectural model.
Photos taking of a model on the early morning
You can rotate the position of the architectural model.
Or you can through the camera lens observe and experiment the different shadow effect on the model.
Photos taking of a model under sunset
We often photograph our model on the rooftop and in a particular position.
And we eliminate all other unrelated objects from the photo and use the sky as the background for the photo.
2.2 Beware of high temperature
High temperature can damage a model, so avoid shooting during a scorching day or midday.
2.3 Beware of shadows
During an indoor photo shoot, avoid the model casting more than two shadows.
Avoiding the model casting more than two shadows
The scene created in a photo will appear unnatural to an audience if an architectural model cast too many shadows.
3. Viewpoints
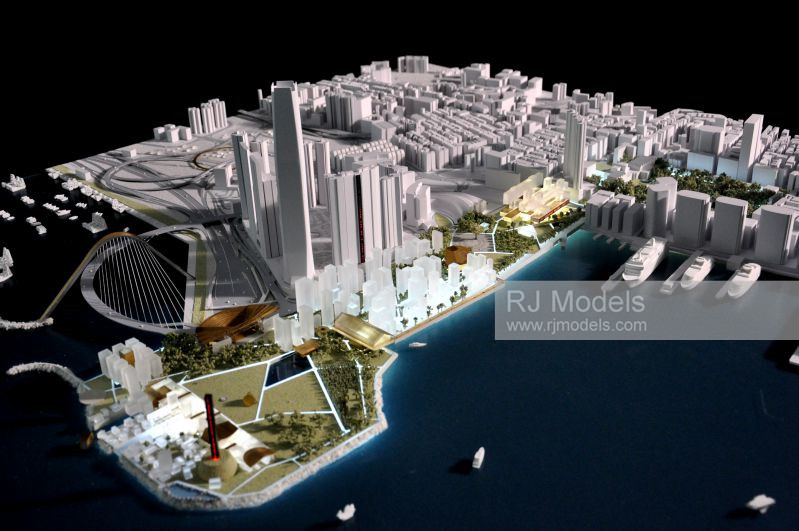
During architectural model photography, we usually take a few photos of the entire model including the front view and back view, and in daylight or as a night scene.
The rest of the photos are either various parts of the model or some tiny details.
We can photograph the architectural model using different angles depending on the thoughts we wish to express.
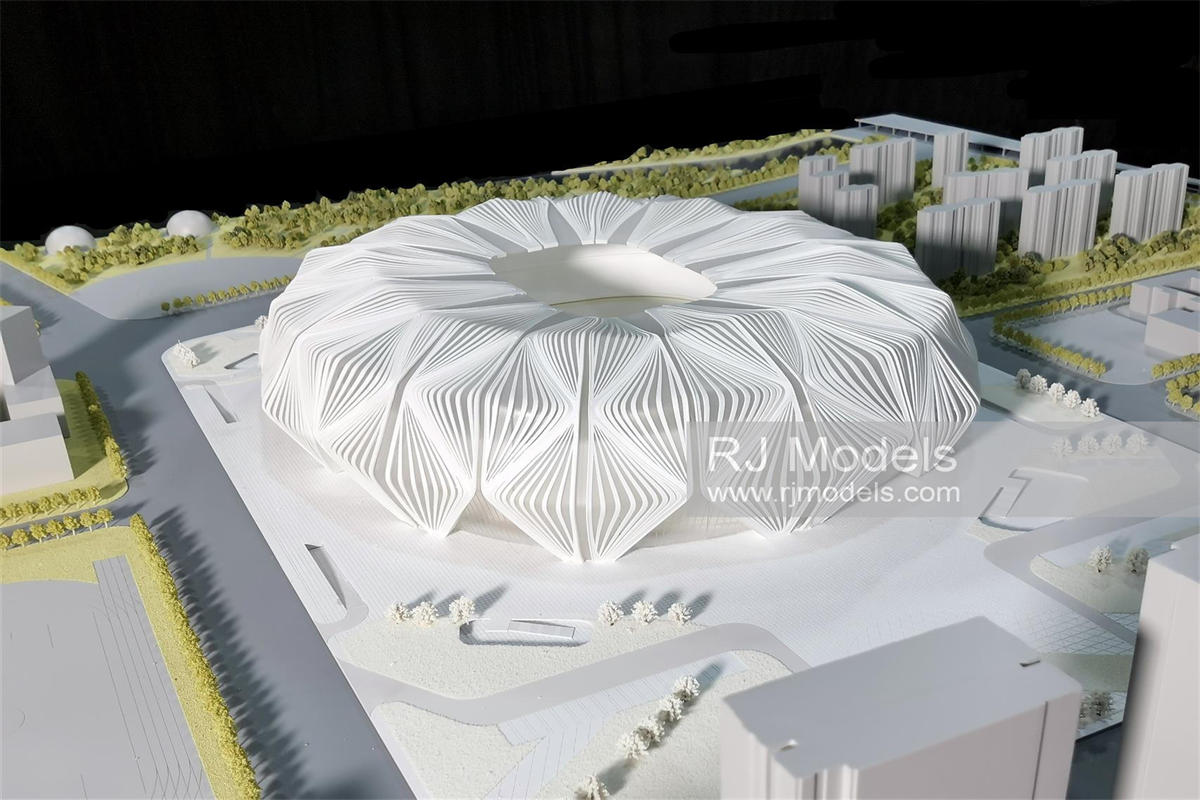
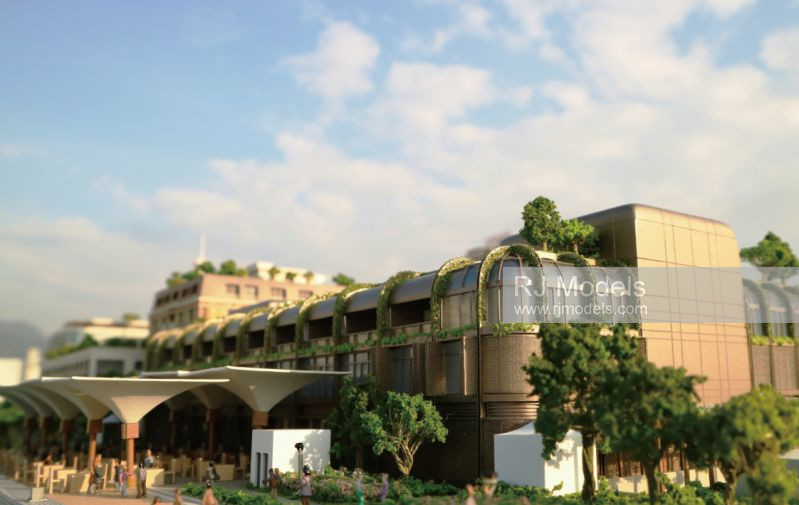
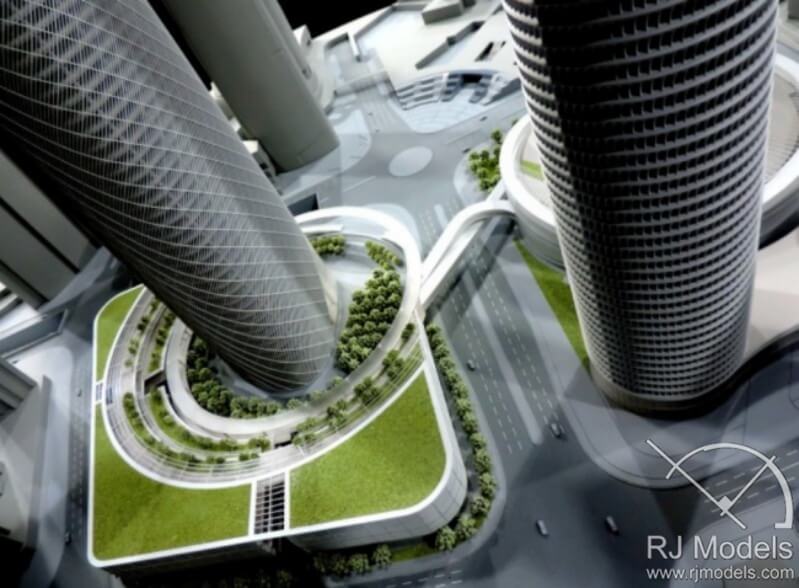
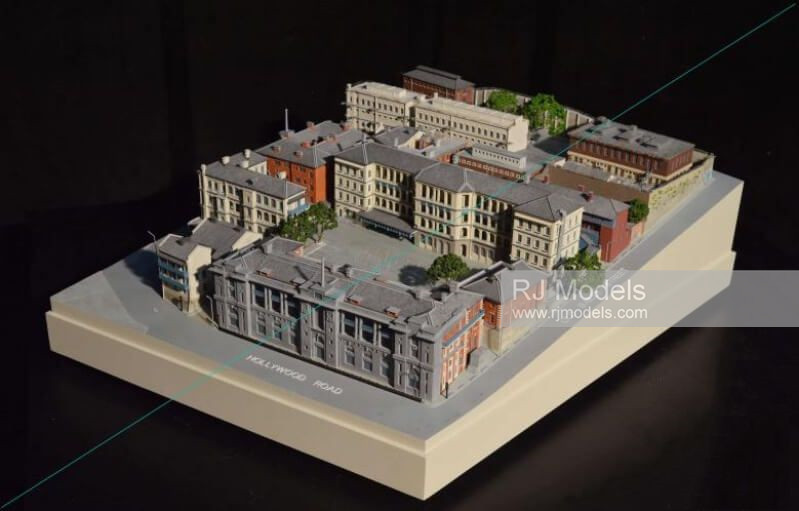
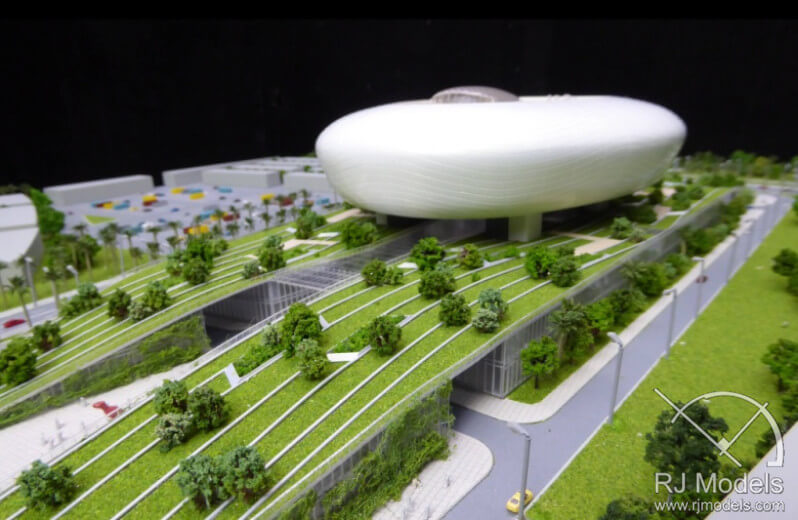
3.1 Shooting with a high viewpoint:.
Allowing a full view of the architecture model
A bird’s eye view of the entire model allows the viewer to see and feel the whole structure of the architectural model.
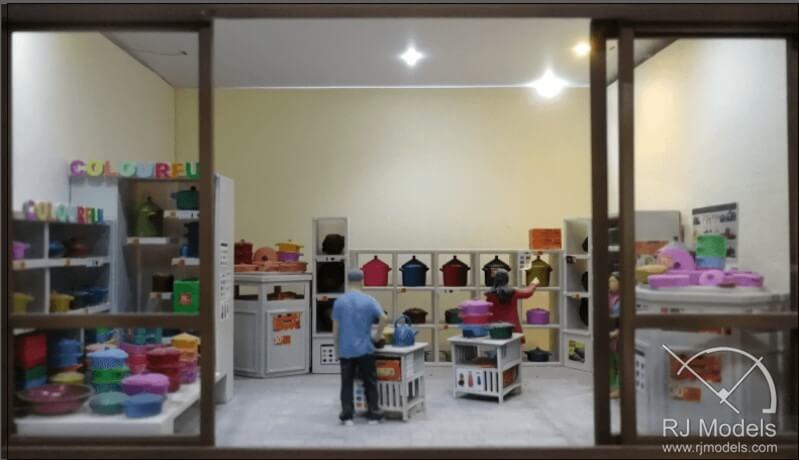
3.2 Shooting with a low viewpoint.
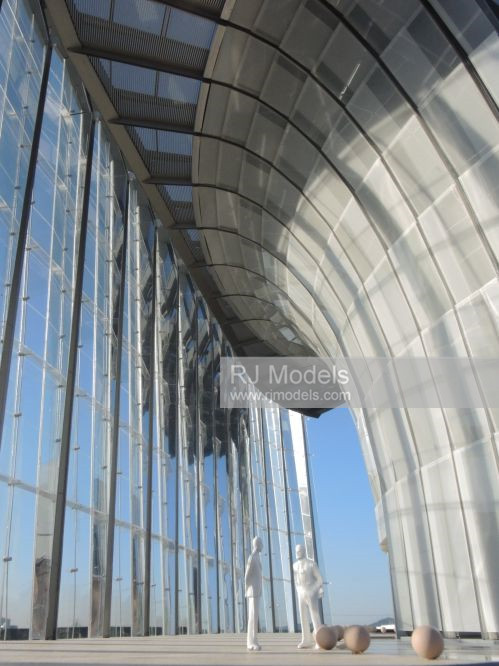
From a person’s perspective
When shooting a model interior using a low viewpoint, it gives the viewer the visual effects of standing on the ground looking up at a building.
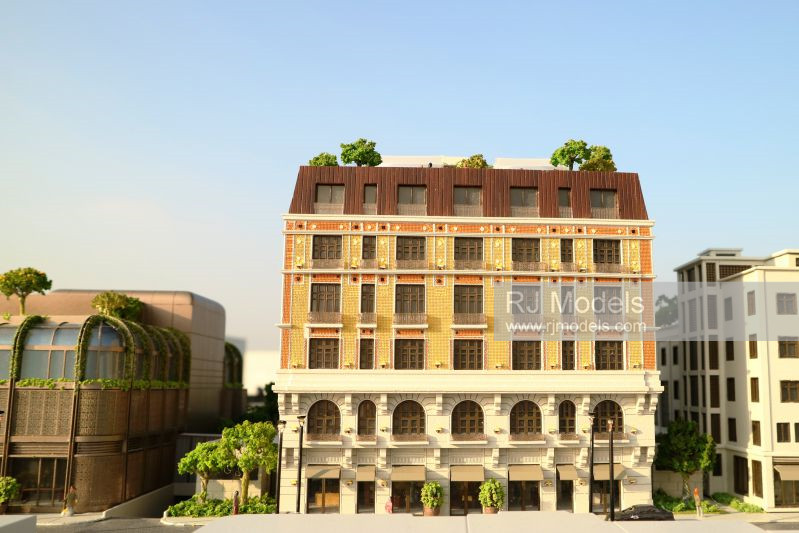
3.3 Shooting with Eye-level Viewpoint
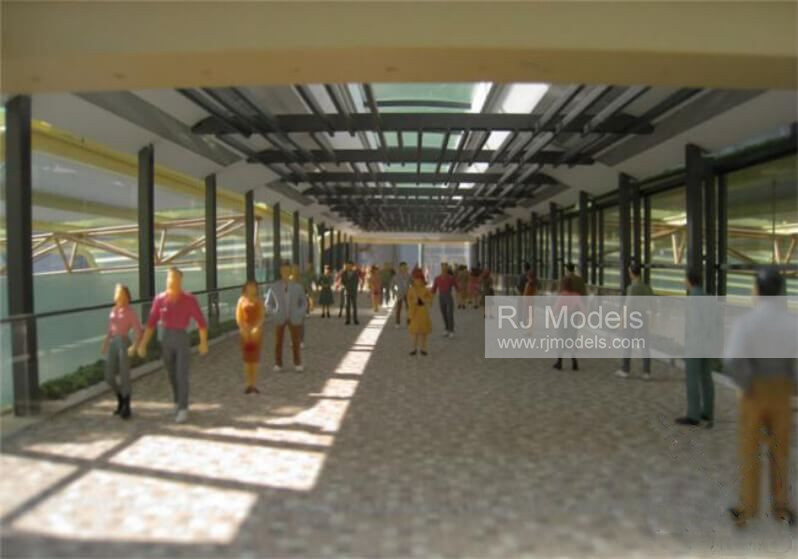
The camera position is at the same level as the model
You can take eye-level viewpoint photo at a person’s eye level relative to their height.
So you can simulate the visual effect of someone’s view in the space they are standing in.
3.4 The reflection of the architectural scale model on the water
If a model has a water surface, a photographer can photograph the reflection of the model on the water.
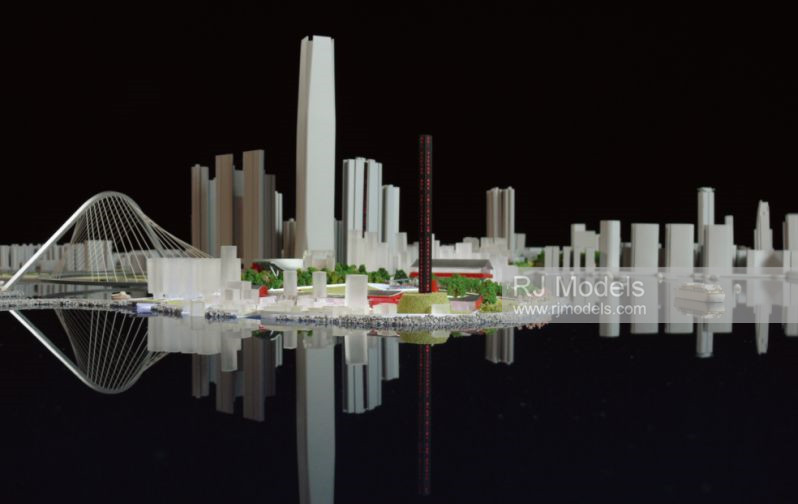
The reflection of the model on the water
3.5 Show the size of the model
Sometimes, we may let’s the audience to have a feel of the model size.
To do this, we will place an object such as a ruler, or a local coin next to the model.
It can show the size of the model on the photo.
Place an object on the model to show the size of the model on the photo
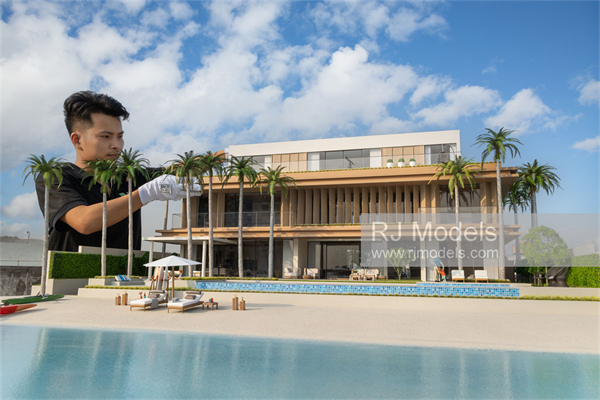
3.6 A person stands next to the architectural model
If the architectural scale model is a sizable display, we will request a person to stand next to the architectural model.
So that the audience can know the actual size of the model relative to the person next to it.
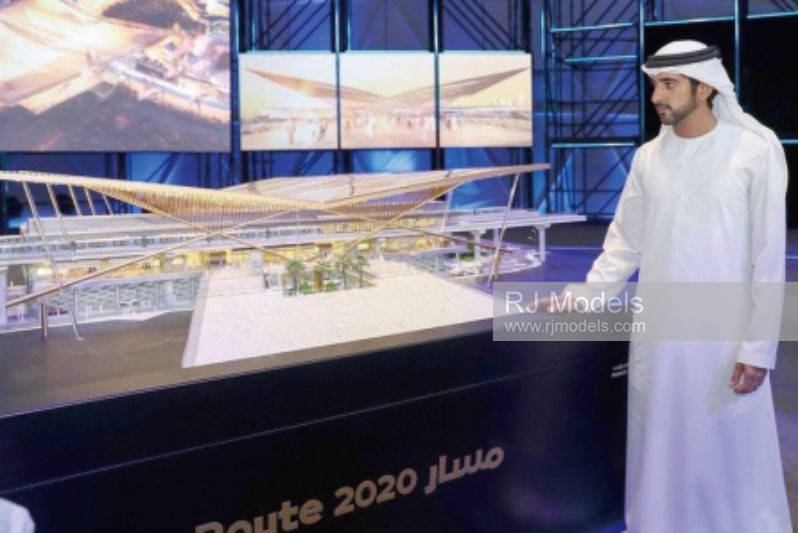
A person stands next to the architectural model
4. Composition
The composition of a photo is also a crucial aspect of photography.
And there are many different rules of composition. We will look at some of them below.
4.1 Rules of Thirds
During photo shooting, you divide the camera frame into thirds horizontally and vertically.
The intersection points are called the points of interest.
When we look at a photo, our eye will subconsciously be drawn to these points of intersection.
Hence, we always place subjects on or near these points of intersection.
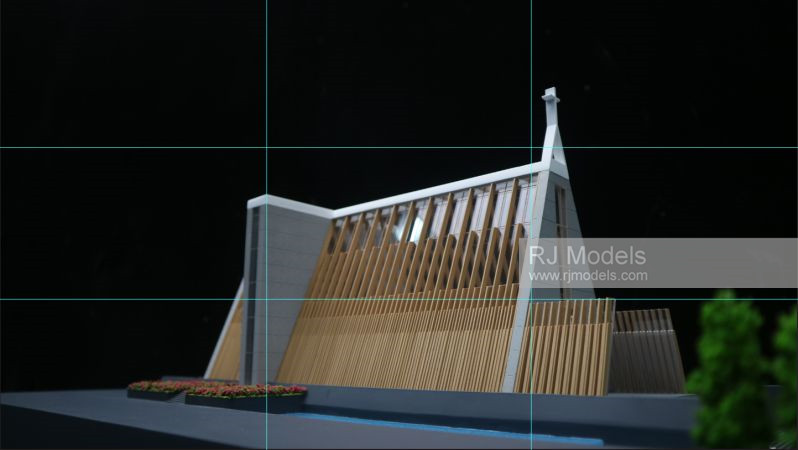
Rules of Thirds
As the camera frame is divided equally into 9 sections, the rule of thirds composition is also known as “tic tac toe composition.”
4.2 Using diagonal line as a technique in composition
The idea is to place the subject along the diagonal line of the camera frame.
So that it appears diagonally on the photo.
This diagonal line technique creates more depth to a photo and gives the picture a more three-dimensional effect.
The diagonal line also draws the person line of sight to the point of interest.
It can make the photo more dynamic and giving it more life, while making the subject more prominent.
Using diagonal line as a technique in composition
4.3 Symmetry Composition
Using the rule of symmetry is to use the subject and its surrounding environment to create an image where one side of the image is the same as the other.
And when the image is split into two, horizontally or vertically, it will create a line of symmetry.
A photo taken using the symmetrical composition gives the audience a sense of stability, formality, and balance.
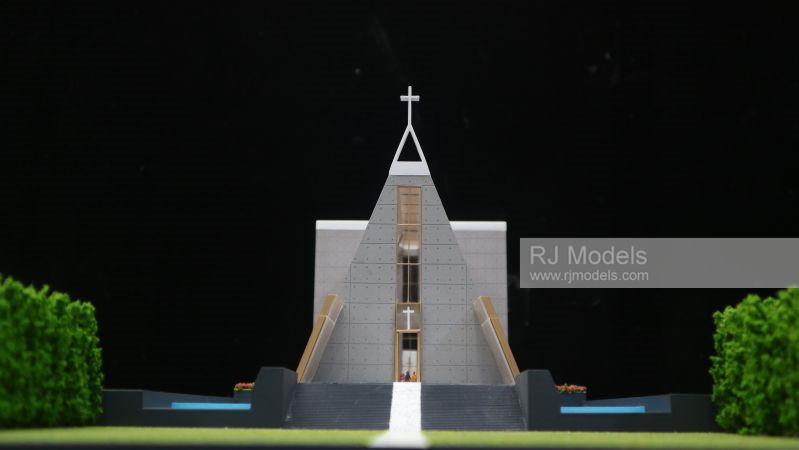
Symmetry Composition
4.4 Framing
We can use framing when a subject is surrounded by an element that is or resembles a frame.
For example, a window frame, door frame, or the entrance of a tunnel.
Framing is a slightly more classic rule of composition.
4.5 Converging Lines Composition
The converging line technique means that multiple lines in a picture extend in the one direction.
And finally converging to a specific position in the photo.
The use of converging lines in photography gives the photo a converging line composition.
Converging lines composition can create a substantial visual impact.
And it can be used to create depth in a photo and can give the picture three-dimensional visual effects.
Converging Lines Composition
4.6 Curving Lines Composition
It does not have to be a perfect curving line.
It can be an incomplete curving line or a curving line with a little radian.
As long as there is a curve, we can use it with curving line composition.
Curving Lines Composition
The above rules of composition are the most commonly used.
It is also quite usual to employ more than one rules of composition when taking a good photo.
4.7 The background
During a photo shoot, the background should be neat and free of elements that are not relevant to the subject.
The settings should also be free of dust.
4.8 Name the photo files
Keep in mind to name the photo files using the architectural model name and its scale.
This will make it easier to access the photos in the future.
Conclusion
Lastly, anyone can master architectural model photography and raise the quality of their photography skills to the top standard.
To do this, one has to be diligent and keep practicing.
Pay attention, experiment and experience the effects a change in lighting can bring.
Keep admiring and learning from the work of other master photographers and 3D architectural rendering